Did you know that a staggering 40% of dairy start-ups fail within the first two years not because of the cows, but because of poor infrastructure and site planning? Most aspiring farmers focus solely on buying high-yielding cattle, only to realize too late that their shed design causes heat stress or their land isn’t optimized for waste management.
The Challenge lies in the massive capital investment required; a single mistake in the “foundation phase” can lead to chronic health issues in your herd and a drain on your bank account. The Main Concept of a successful launch is Integrated Infrastructure Design—the seamless harmony between land utility, cow-centric housing, and precision equipment. This guide provides a comprehensive roadmap for your dairy setup, ensuring that your physical assets work as hard as your animals to deliver a profitable, sustainable business in 2026.
Understanding Dairy Infrastructure: Key Concepts and Importance
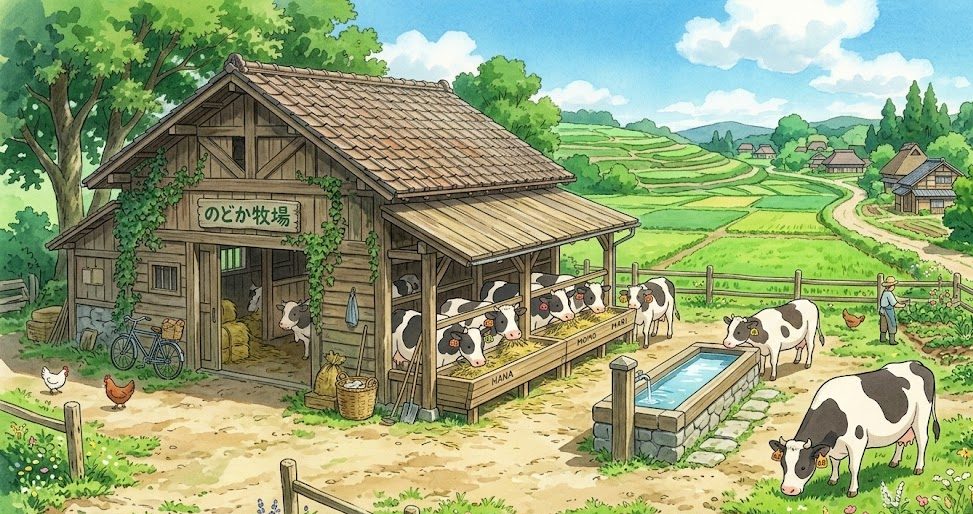
Setting up a dairy farm is essentially building a biological production plant. Historically, cows were kept in rudimentary shelters, but the modern dairy industry recognizes that a cow’s environment is the primary driver of her productivity. The fundamental objective of your setup is to provide “Total Cow Comfort.”
Think of your dairy shed like a high-end luxury hotel. If the guests (the cows) are hot, cramped, or sleeping on hard, dirty floors, they won’t “perform” (produce milk). However, if the hotel provides climate control, soft beds, and easy access to a 24/7 buffet, the guests remain happy and productive.
In technical terms, this involves managing the Micro-climate—the temperature and humidity immediately surrounding the animal. Modern dairy setup importance is rooted in its ability to mitigate heat stress, which can drop milk yields by up to 25% in a single afternoon. By mastering the fundamentals of land orientation, shed ventilation, and automated equipment, you are creating a resilient system that protects your biological assets from the elements.
Why It Matters: The Top Benefits of a Professional Setup
A well-planned dairy setup is not an “expense”; it is a long-term wealth generator. When you invest in the right land and equipment from day one, you unlock several critical advantages:
- Maximum Lactation Potential: Cows in well-ventilated sheds with sand-bedded stalls spend more time “lying down.” Every extra hour of rest translates to roughly 2 to 3 pounds of additional milk because blood flow to the udder increases during rest.
- Significant Labor Reduction: Automated manure scrapers and milking parlors can reduce your manual labor requirements by over 50%, allowing you to manage a larger herd with fewer staff members.
- Superior Health & Longevity: A professional shed design eliminates “dead air” and dampness, the two primary causes of Pneumonia and Mastitis. Healthy cows stay in your herd longer, reducing your replacement costs.
- Environmental Compliance: A strategic waste management layout allows you to convert manure into “liquid gold” (fertilizer), turning a potential pollution headache into a valuable farm input or secondary revenue stream.
Pro Fact: In 2026, dairy farms using compost-bedded pack sheds report a 15% increase in cow longevity compared to traditional tie-stall systems.
How to Get Started: A Practical Guide for Beginners
Launching your dairy farm requires balancing three pillars: Land, Shed, and Equipment. Follow this 5-step actionable plan to build your foundation.
Step 1: Land Evaluation and Orientation
You need approximately 1.5 to 2 acres per cow if you plan to grow your own fodder. The site must have a high water table or reliable borewell access. Crucially, orient your shed in an East-to-West direction to minimize direct sunlight penetration, keeping the interior cool.
Step 2: The “Cow-Centric” Shed Design
Avoid “enclosed” buildings. The best sheds are open-sided with a high roof (at least 12-15 feet at the eaves) to allow for the stack effect—where hot air rises and exits through a ridge vent, pulling cool air in from the sides. Use Headlocks or Neck Rails at the feeding line to prevent cows from wasting expensive fodder.
Step 3: Flooring and Bedding
The floor must be non-slip concrete (grooved) to prevent leg injuries. For the sleeping area, Sand is the Gold Standard. It is inorganic (doesn’t grow bacteria), stays cool, and contours to the cow’s body, significantly reducing the risk of udder infections.
Step 4: Essential Milking Equipment
For a beginner with 10–20 cows, a Double-Bucket Milking Machine is sufficient. For 50+ cows, a Herringbone or Parallel Milking Parlor is necessary. Ensure you have a Bulk Milk Cooler (BMC); chilling milk to 4°C within two hours of milking is the only way to maintain “Grade A” quality.
Step 5: Waste Management Infrastructure
Construct a slurry pit or a dung yard with a slight slope (1-2%). This allows you to collect “wash-water” separately, which can be pumped directly into your fodder fields as nutrient-rich irrigation.
Beginner’s Tip: Never build your shed in a low-lying area. Poor drainage leads to “muddy-lot syndrome,” which is the fastest way to lose a herd to hoof rot and environmental mastitis. Always build on a slightly elevated “pad.”
Overcoming Challenges and Looking into the Future
The biggest challenge for the 2026 dairy farmer is Rising Utility Costs. High-volume fans and cooling systems are energy-intensive. To solve this, many new setups are integrating Bifacial Solar Panels on shed roofs, which provide shade while powering the farm’s automated systems. Another hurdle is the high cost of construction materials; the trend is moving toward Pre-Engineered Metal Buildings (PEB) that are faster to install and easier to sanitize than wood or traditional masonry.
The future of dairy setup is Modular Automation. We are moving toward Robotic Milking Stalls that can be added like Lego blocks as your herd grows. Additionally, Precision Cooling Systems are now being used—sensors detect a specific cow’s body temperature and activate a targeted mister only over that animal, saving thousands of gallons of water per year.
Conclusion
A dairy farm is a marathon, not a sprint, and your infrastructure is the track you run on. By focusing on East-West orientation, ventilated shed design, and sand-bedded comfort, you are removing the barriers that prevent cows from reaching their genetic potential. When the shed is built right and the equipment is chosen wisely, the cows will reward your investment with consistent, high-quality yields for years to come.
Your Next Step: Before you lay a single brick, use a “Sun Path” app on your smartphone to check the shade patterns on your chosen site. Ensuring your cows are in the shade during the hottest part of the day is the first step toward your first million liters.
Frequently Asked Questions (FAQs)
1. How much land do I need for a 10-cow dairy farm?
If you are buying all your feed (Zero-grazing), you only need about 0.5 acres for the shed and waste area. However, if you want to be self-sufficient in fodder, you will need 5 to 8 acres of fertile, irrigated land.
2. Is a milking machine better than hand milking for a beginner?
Yes. A milking machine provides a consistent pulsation that is gentler on the cow’s teats than manual squeezing. It also ensures the milk is never exposed to the open air, keeping it free from barn dust and bacteria.
3. What is the best roofing material for a dairy shed?
Galvanized Iron (GI) sheets with insulation or Galvalume are common, but Light-colored Fiber-Reinforced Plastic (FRP) or clay tiles are superior for heat reflection. Avoid simple uninsulated tin sheets, as they turn the shed into an oven during summer.
4. How much water does a dairy farm require daily?
Expect to use 100 to 150 liters per cow per day. This includes drinking water (up to 80 liters), shed cleaning, and udder washing. A reliable, high-capacity water source is the most critical part of your land selection.